
Starting March 31, 2025, Google is changing how third-party applications can access your Google Photos. Google is now restricting 3rd party applications from reading your entire Google Photos library. This change means Pixo can no longer synchronize your Google Photos albums with Pixo.
You will now need to select photos from your Google Photos collection to create Pixo albums to display on your TV. You will also be able to add and remove photos from the Pixo albums you create. This change only affects Google Photos. All other photos sources including the Camera Roll will continue to synchronize automatically with Pixo.
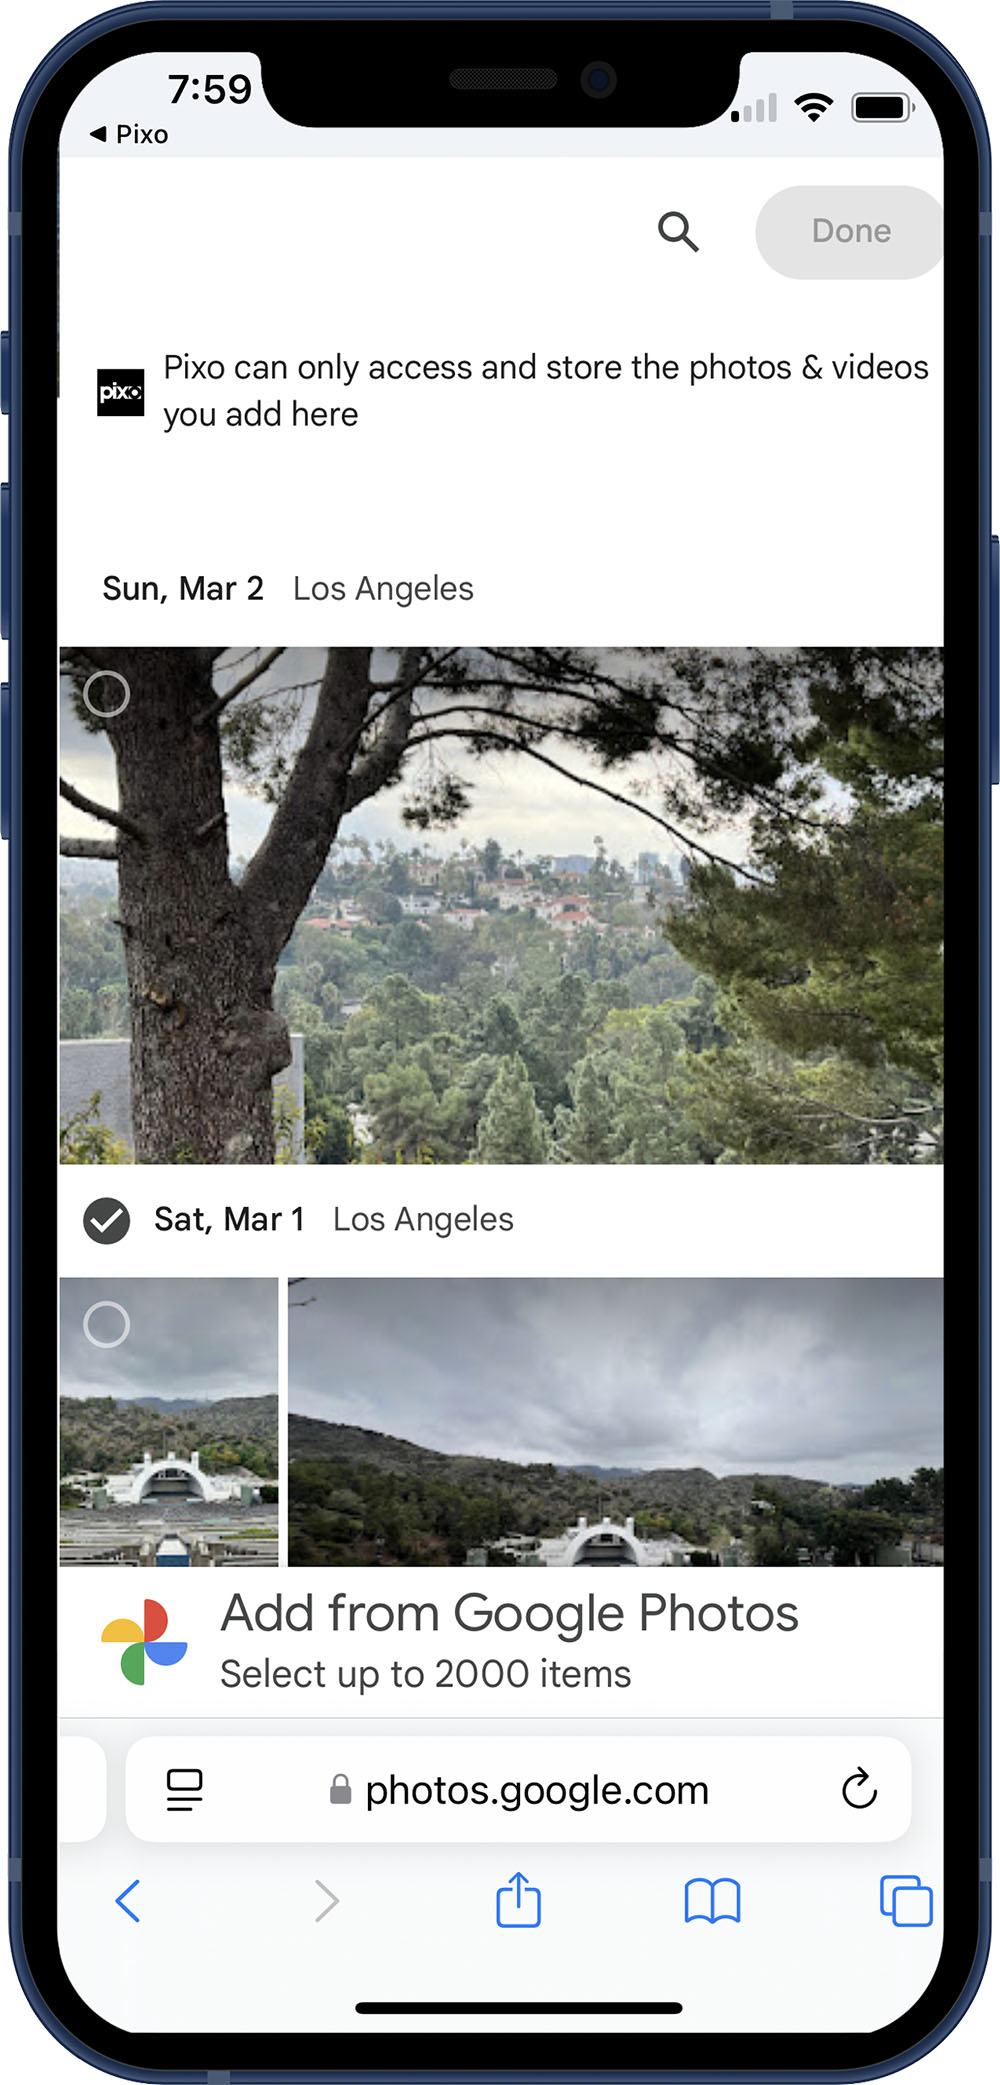
The Google Photos Picker is custom-built for secure photo picking and provides robust photo selection capabilities, including selecting individual items, selecting all items within albums, and searching your Google Photos library.
Creating a Pixo Album from Google Photos
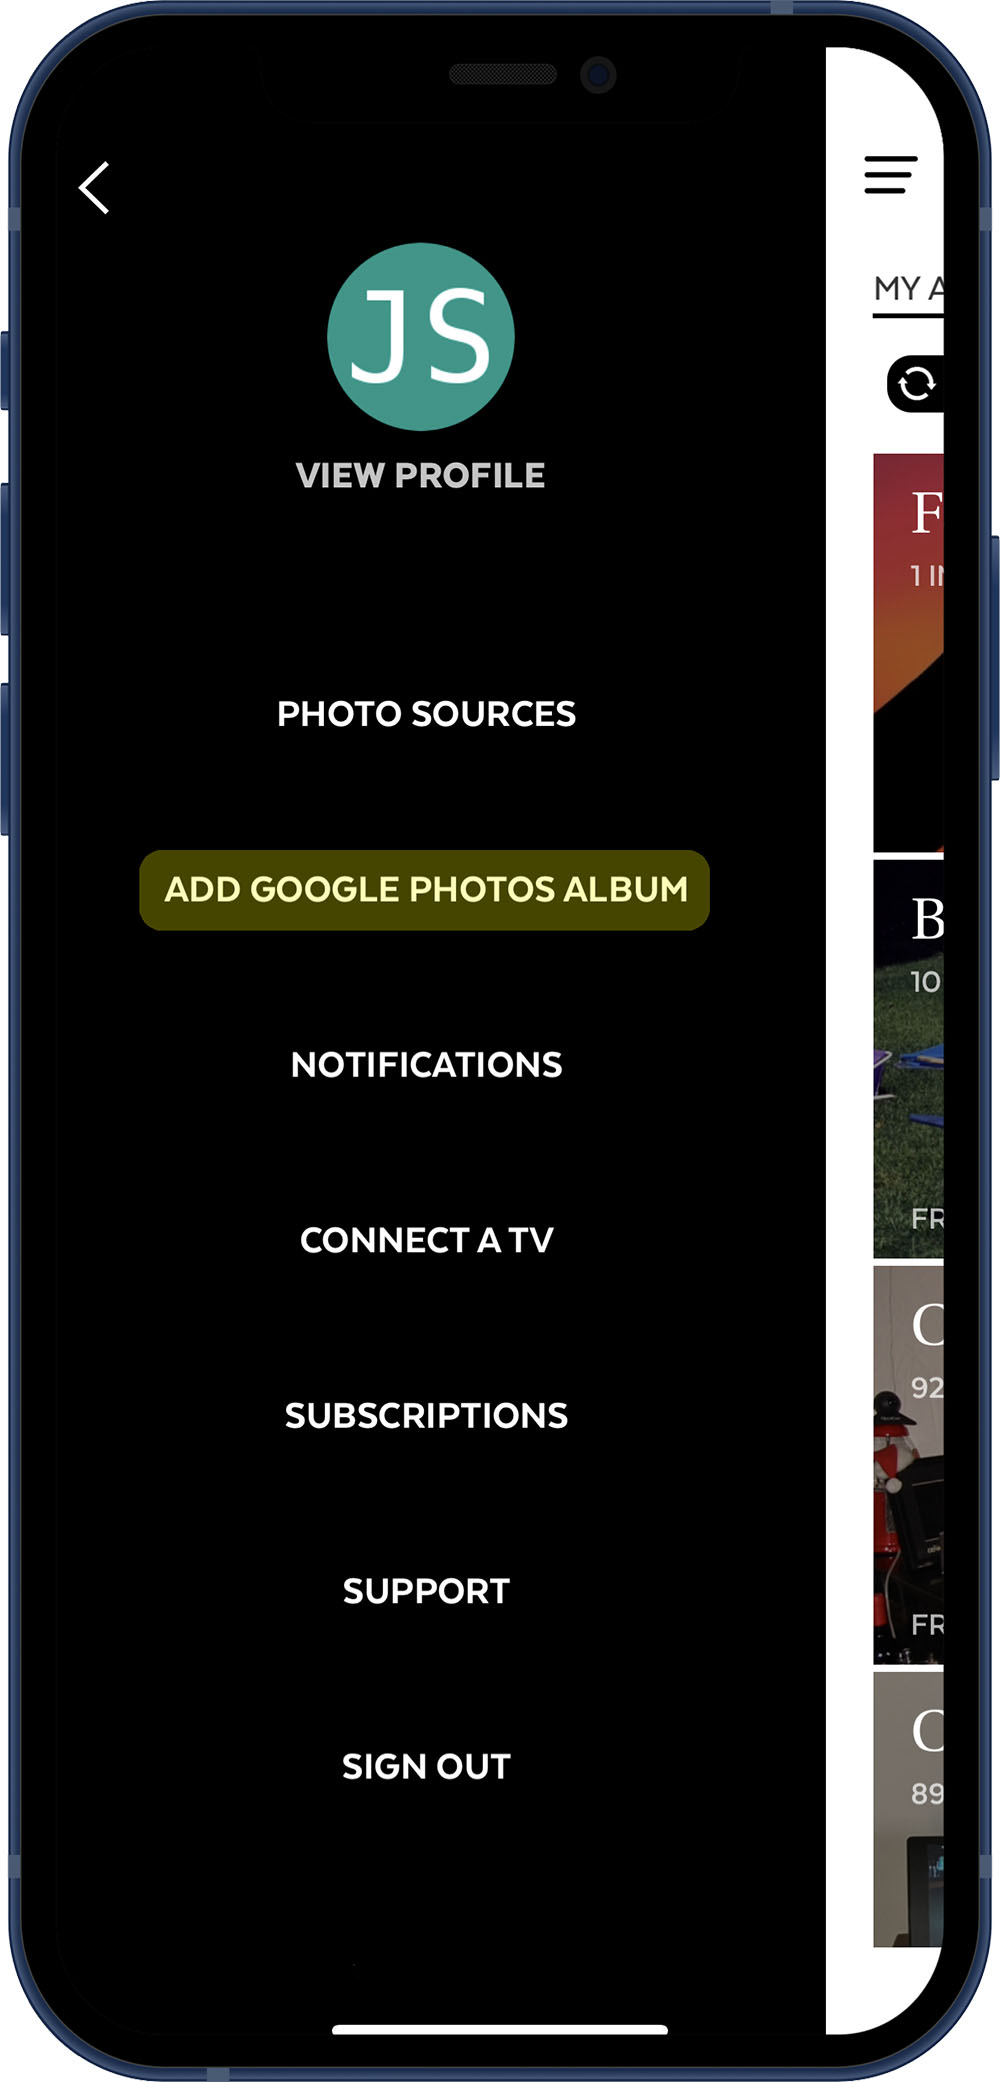
- Open the menu and select CREATE A GOOGLE PHOTOS ALBUM.
- Tap the SELECT PHOTOS.
- The Google Photo Picker will open.
- Use the Google Photos Picker to select the photos you would like to add to the Pixo album (up to 2000).
- Tap the DONE.
- Go back to the Pixo app. The photos are now importing. If you selected a larger number of photos, it may take a few minutes to import them all.
- You can now play the album on your TV.
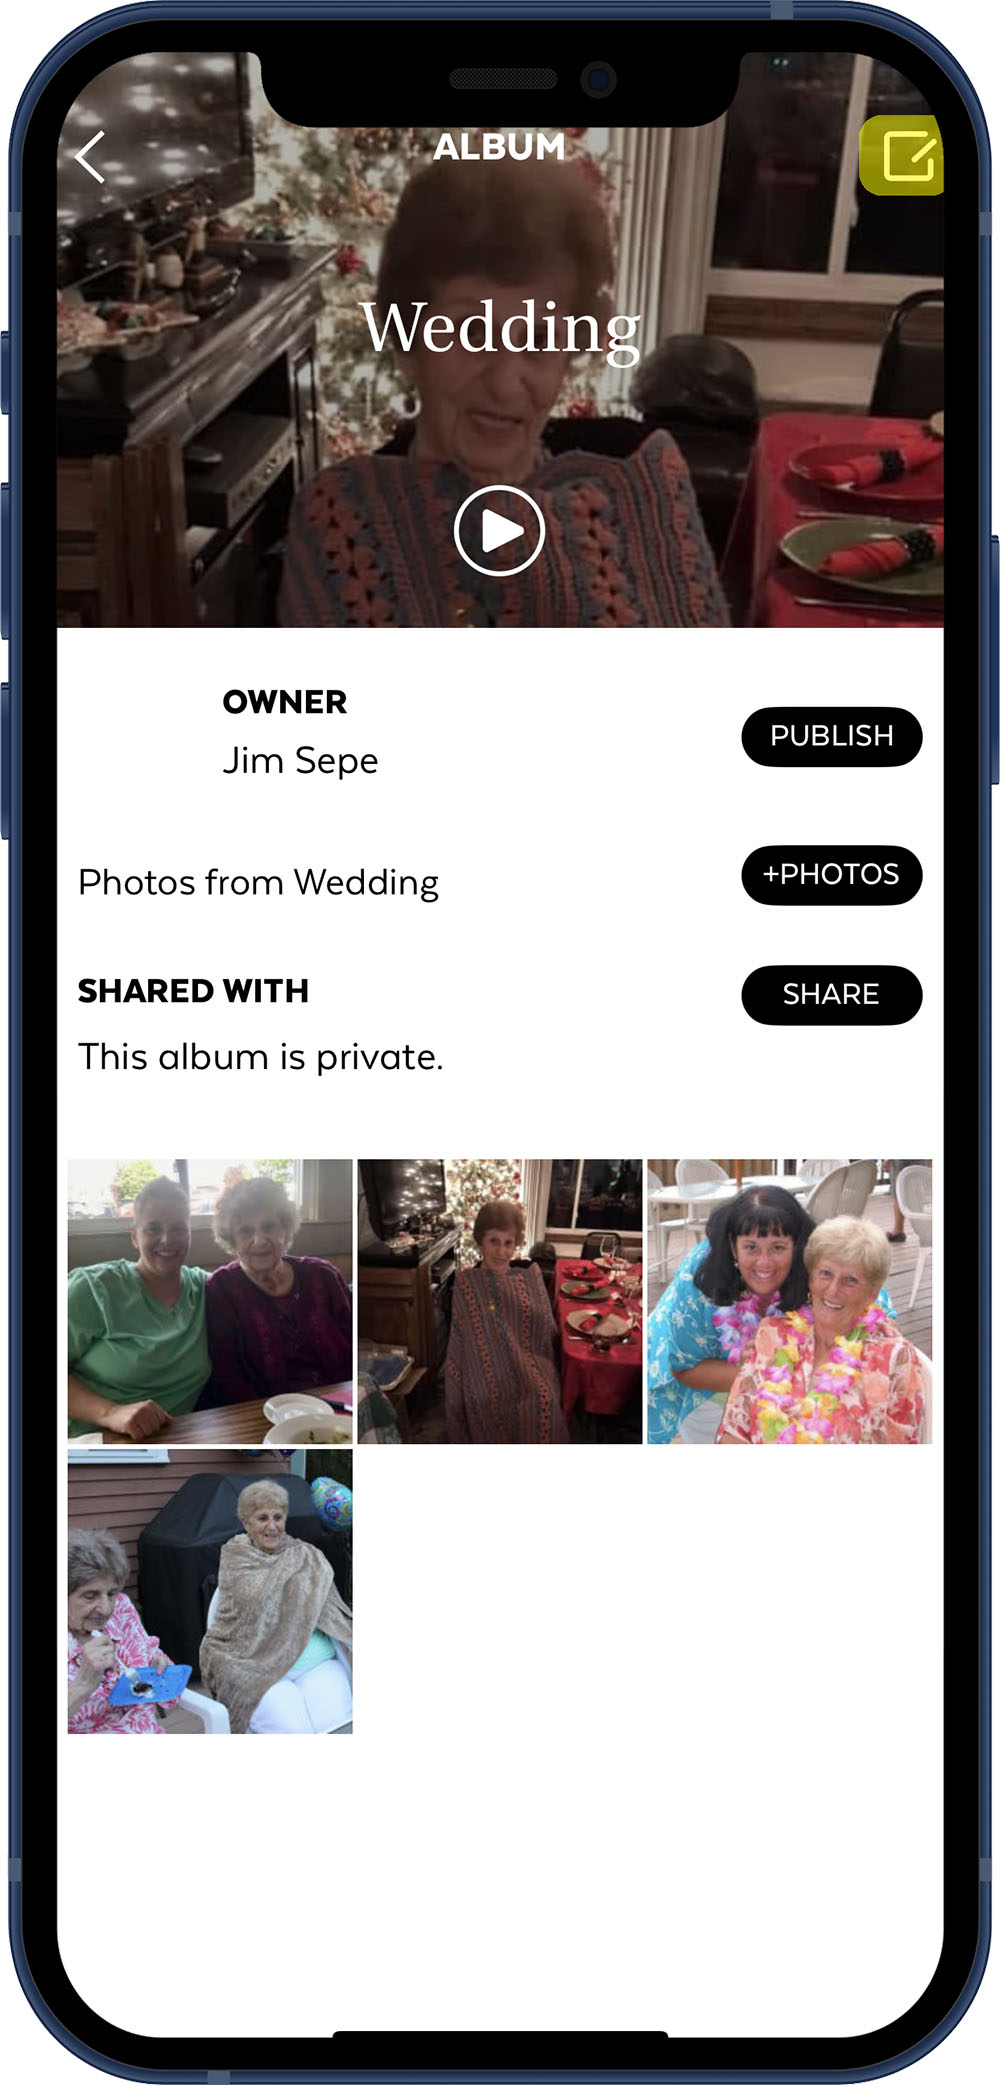
Adding photos to a Pixo album that was created from Google Photos
- Open the Pixo app and navigate to the dashboard.
- Tap on the Pixo album you wish to add additional photos from your Google Photos.
- Tap the +PHOTOS button.
- The Google Photo Picker will open.
- Use the Google Photos Picker to select the photos you wish to add (up to 2000).
- Tap the DONE.
- Go back to the Pixo app. The photos are now importing. If you selected a larger number of photos, it may take a few minutes to import them all.

Deleting photos from a Pixo album that was created from Google Photos
- Open the Pixo app and navigate to the dashboard.
- Tap on the Pixo album you wish to remove photos from your Google Photos.
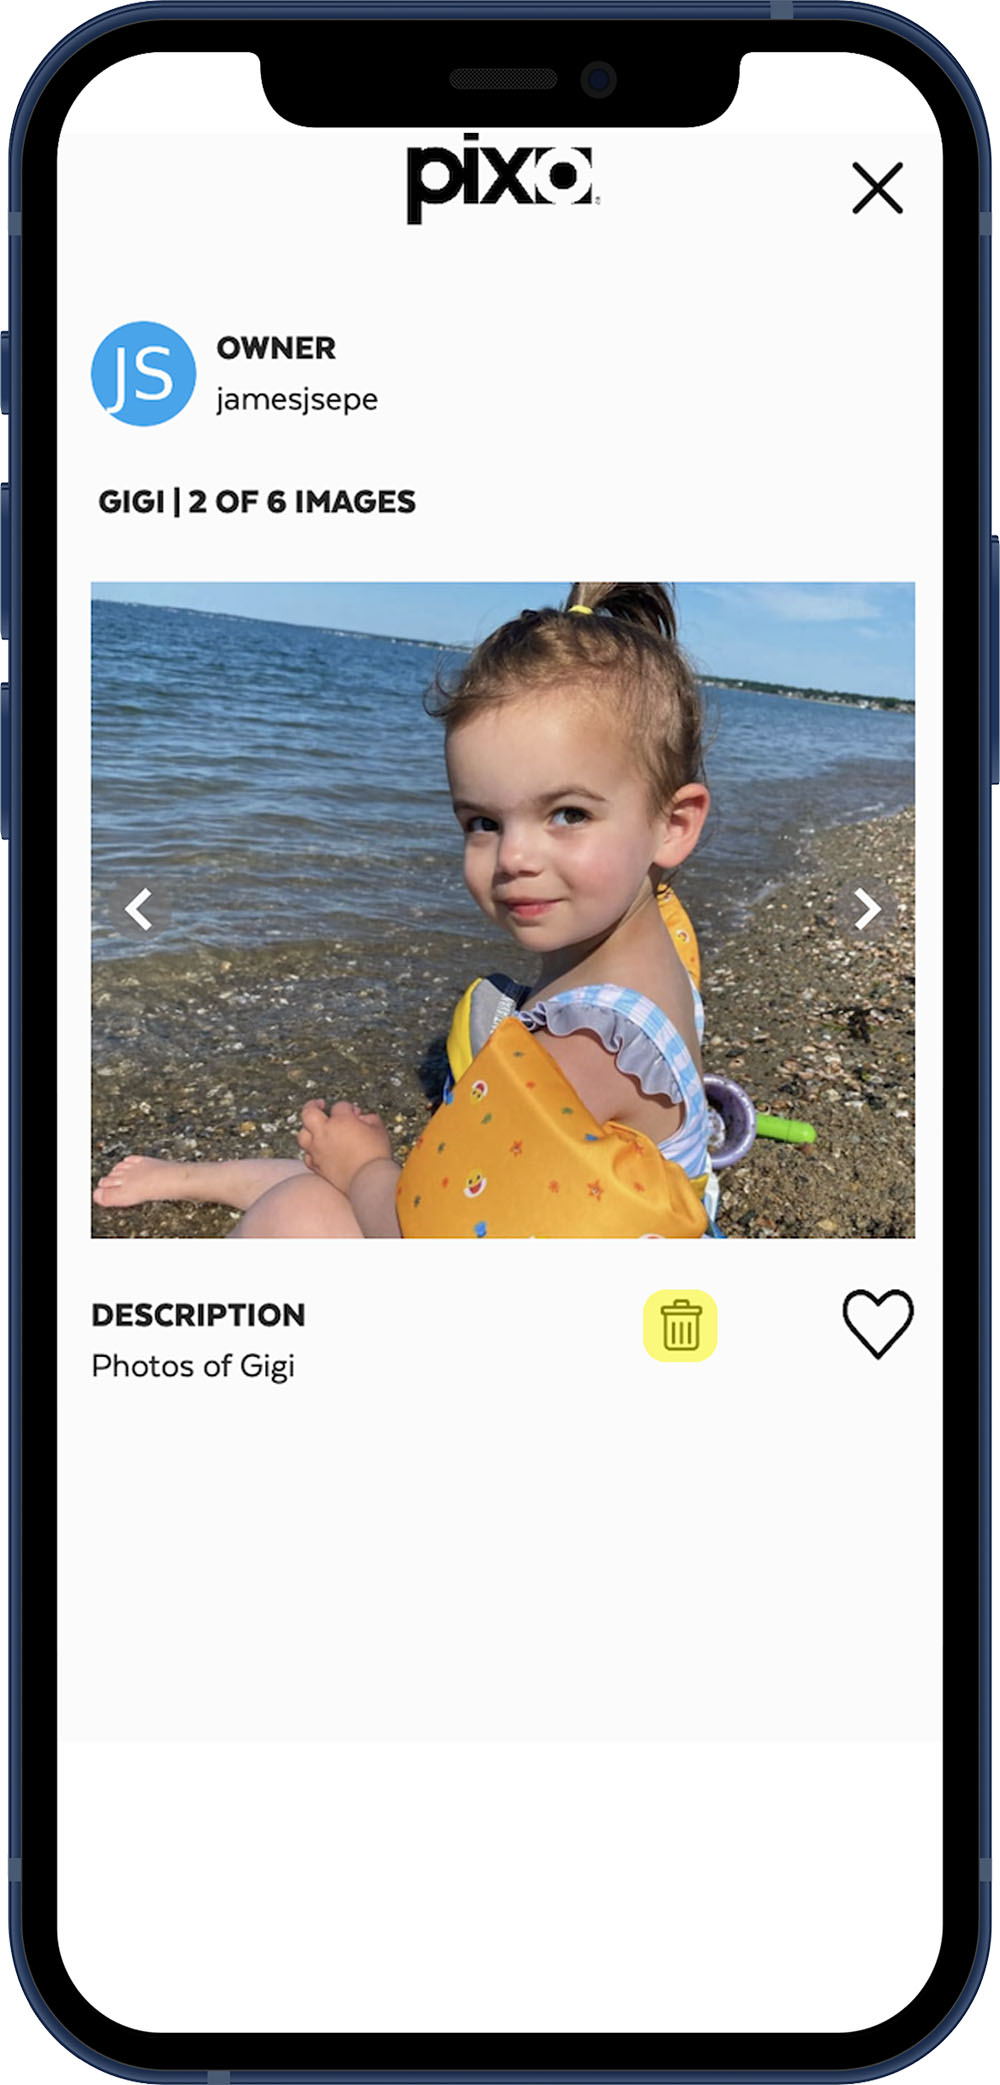
- Tap the photo you wish to remove.
- Tap on the trash can icon.
- The photo will be removed from the Pixo album. Your Google Photos album will remain unaltered. Pixo will never remove any photos from your Google Photos Library.
Deleting a Pixo album that was created from Google Photos
- Open the Pixo app and navigate to the dashboard.
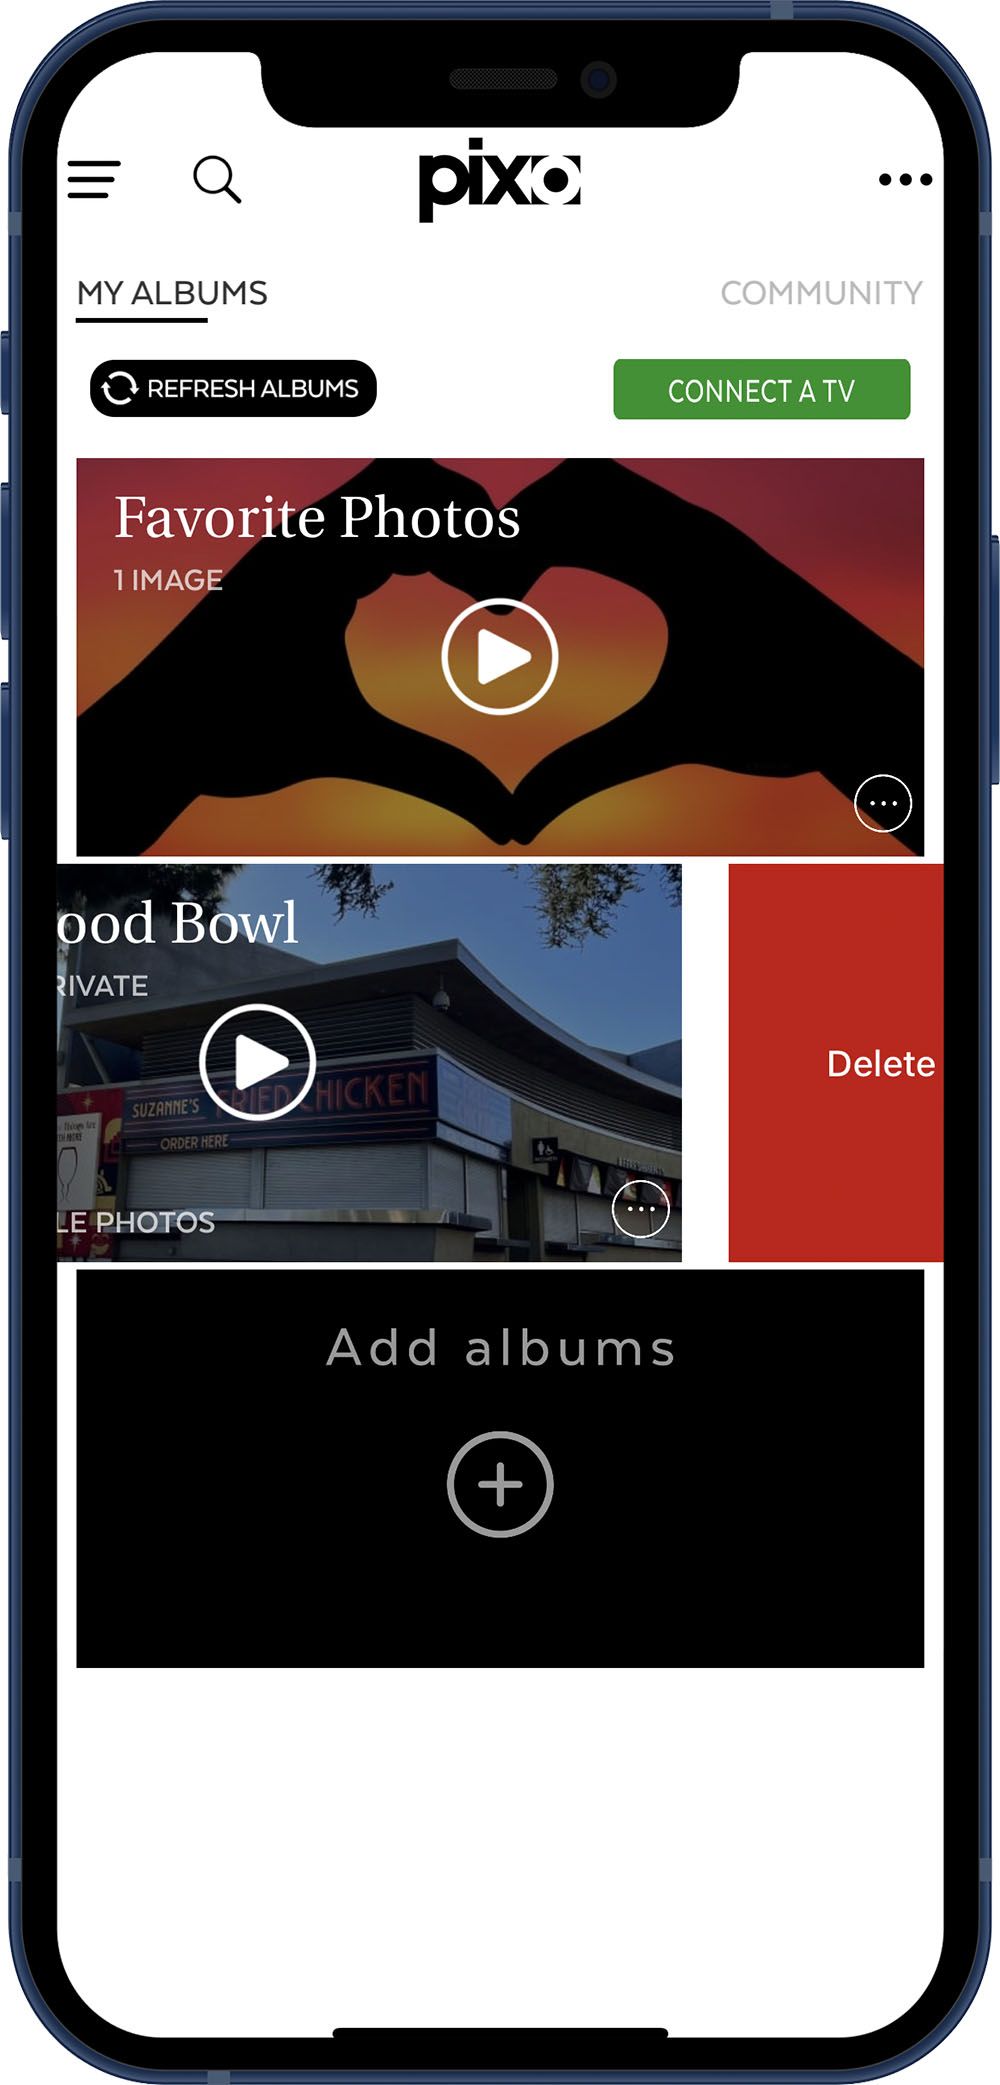
- Locate the album you wish to remove.
- Swipe left.
- Select the Delete.
- Tap the photo you wish to remove.
- The album will be removed from Pixo. Your Google Photos album will remain unaltered. Pixo will never remove any photos from your source.
Changing the name of a Pixo album that was created from Google Photos
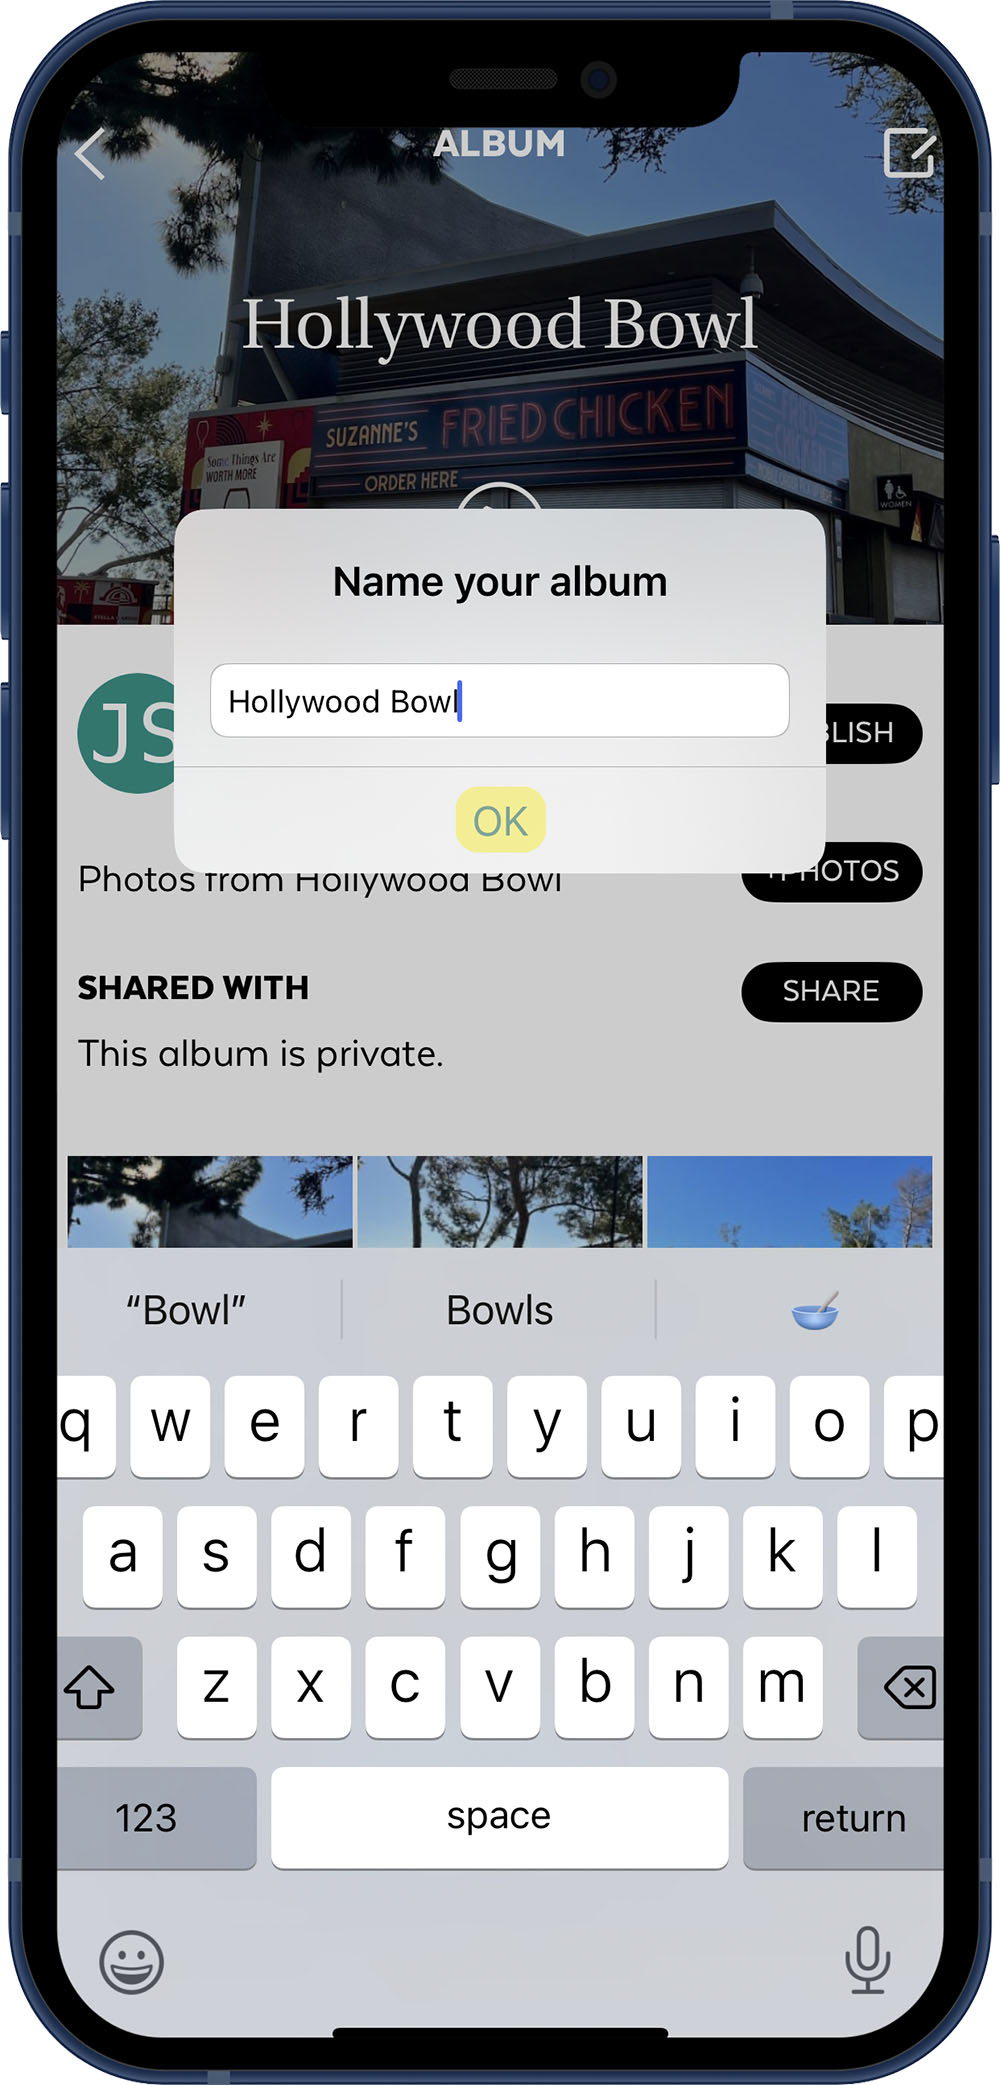
- Open the Pixo app and navigate to the dashboard.
- Tap on the album.
- Tap the edit button in the upper right.
- Rename the album.
- Tap Save.
- The album name will be changed in Pixo. Your Google Photos album name will remain unaltered. Pixo will never modify you Google Photos Library.